When striving for professional video quality, mastering lighting techniques is key. Natural light can work wonders, providing a warm and cinematic feel, especially during specific hours. Positioning your subject strategically near light sources like windows can make a significant difference. Key lights placed at a 45-degree angle play a crucial role in visibility, while light modifiers can add a touch of finesse to your videos. The right lighting setup can truly elevate your production, but there's more to discover beyond the basics.
Importance of Natural Light
To capture high-quality videos, prioritize utilizing natural light whenever possible. Natural light provides a soft, flattering illumination that enhances the overall look of your video. When shooting indoors, position your subject near windows or doors to take advantage of the natural light streaming in. This will help avoid harsh shadows and create a more natural and inviting atmosphere.
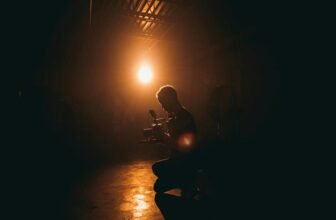
Keep in mind that the quality of natural light can vary throughout the day. The golden hours, which occur during sunrise and sunset, offer a warm, soft light that can add a cinematic touch to your videos. Midday light can be harsh, causing unflattering shadows, so it's best to shoot during the morning or late afternoon for more even lighting.
Additionally, consider using reflectors to bounce natural light onto your subject and fill in any shadows. Reflectors are affordable and easy to use tools that can make a significant difference in the quality of your videos. Experiment with different angles and positions to find the most flattering lighting setup for your specific shooting environment.
Utilizing Key Lights
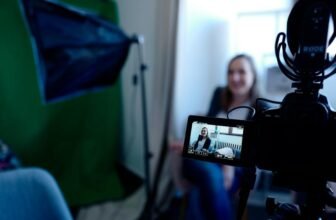
For optimal lighting in your professional videos, consider incorporating key lights to enhance the subject's visibility and overall video quality. Key lights are essential in creating a well-lit subject by providing the primary source of illumination. These lights help define the subject's features, add depth to the shot, and contribute to a professional look.
When setting up key lights, position them at a 45-degree angle to the subject to create natural-looking shadows that add dimension without causing harsh contrasts. It's crucial to adjust the intensity of the key lights based on the desired mood and style of your video. Additionally, using diffusers or softboxes with key lights can help create a softer, more flattering light on the subject, reducing harsh shadows and minimizing imperfections.
Experiment with different placements and intensities of key lights to find the perfect balance that highlights your subject effectively while maintaining a visually appealing aesthetic.
Enhancing Ambient Light
Enhance the ambient light in your professional videos by strategically positioning reflectors to bounce light onto your subject, creating a natural and flattering glow. Reflectors can help you make the most of existing ambient light sources by redirecting and enhancing their illumination.
Place the reflector opposite the light source to bounce light back onto your subject, filling in shadows and adding a soft, diffused glow to your footage.
When using reflectors, consider the size and material of the reflector to achieve the desired effect. Larger reflectors will produce softer and more widespread light, whereas smaller ones can create more focused highlights. Experiment with different angles and positions to find the best lighting setup for your specific shooting environment.
Using Light Modifiers
Maximizing the effectiveness of your professional video lighting involves skillfully incorporating light modifiers into your setup. Light modifiers, such as softboxes, umbrellas, and reflectors, play a crucial role in shaping the quality and direction of light in your videos.
Softboxes diffuse harsh light, creating a gentle and even illumination that's flattering for your subjects. Umbrellas can be used to bounce and soften light, reducing shadows and creating a more natural look. Reflectors help fill in shadows by bouncing light back onto your subject, enhancing details and adding depth to your shots.
When using light modifiers, it's essential to experiment with different setups to achieve the desired effect. Positioning your modifiers at various angles can dramatically alter the mood and tone of your videos. Additionally, consider the distance between the light source and your subject, as this can affect the intensity and softness of the light.